Installing XENIX 386 on a real intel 486 PC Part 3
Sunday, June 29, 2014, 11:00 PM
Posted by Administrator
Before I try to install Streams and TCP/IP, let's try VP/IX.
I got three 1.2MB disk images, but to install it with my 1.44MB floppy drive in my 486-PC, I had to convert the disks first. How ? Easy if you already had installed XENIX.
1. Copy each 1.2MB disk image file onto a DOS formatted 1.44MB floppy disk media
2. Run XENIX and use doscp to copy the disk image files onto your harddisk
3. Use the dd command to transfer it back to a real floppy media:
dd if=vpixdsk1.img of=/dev/fd0 (or instead of "fd0" use "rfd0135ds18")
4. Do this for all three images
(as a result, you should get three 1.44MB installation disks)
Now type in 'custom' again, choose '4' (for additional packages) and if asked, insert the first of the three floppy disks. You should select 'ALL' as an option, a bit later you had to insert the other two disks also. When you typed in the serial number/activation successfully, it should go back to 'custom'. Just exit.
Now how to run VP/IX ? Easy if you know it. Just type in 'vpix' on console.
Even a BIOS is loaded, similar to modern virtual machine software.
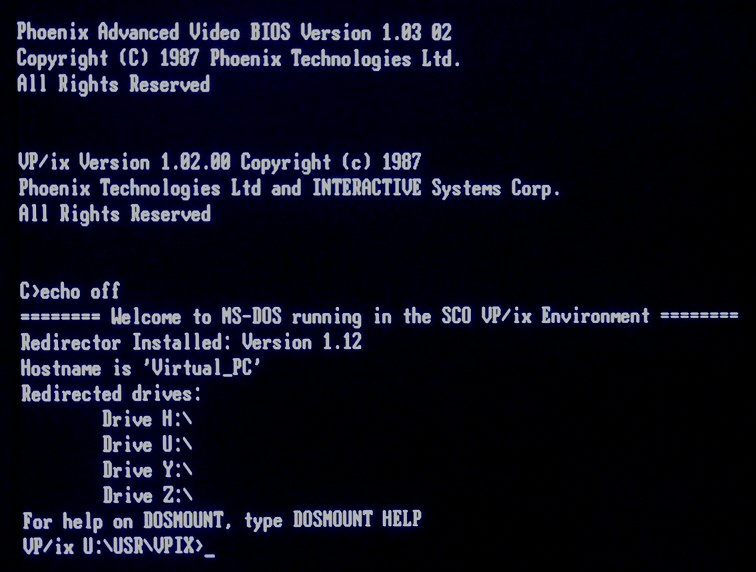
Now you are able to type in DOS commands. 'VER' returns DOS 3.30.
Using ALT-F1, ALT-F2 and so on you can run DOS more than once... nice.
To exit VP/IX, type in 'vpixcmd quit' ... that's all.
Using Google there is almost nothing to find about VP/IX .... strange.
But next time I will tell you my expiriences with TCP/IP and XENIX, promised.

;)


 Random Entry


